Assumptions, Notes, and Givens
Amazon’s Web Application Firwall (WAF) as a service is a key pillar in the protection of your online applications. This tutorial gives you a start with AWS WAF, by walking you through the creation of a sandbox.
You will
- Build a trivially simple application fronted by an Application Load Balancer.
- Count traffic from one potentially hostile host while passing traffic from another host.
- Work with the basic building blocks of the WAF.
- Block traffic from the hostile host.
- Watch and reason about statistic provided by the WAF on traffic filtering.
At the end of this tutorial you will have a WAF sandbox and a general grasp of the basic concepts of the Amazon WAF service. In that sandbox you can run experiments and learn how to protect your live web applications.
It is assumed you have access to an AWS account and that you can launch infrastructure in EC2 and WAF.
It is assumed you are familiar with:
- the AWS Console and EC2.
- basic installation of Ubuntu packages
- basic shell scripting
All activity will take place in the AWS Region us-east-1 (Virginia).
GOTCHA: Links to the console in this article will put you in the us-east-1 region. That should not be a problem but do be aware.
Overview
To create a safe sandbox to experiment with the Amazon WAF we will:
- Launch two t2.micro instances
- Launch an ALB and asscoiate one instance, running Apache, to it
- Deploy a shell script to the second instance
- Attack your “application” with the shell script from your local worstation
- Pass valid traffic from your other AWS instance
- Observe and tune various behaviors of the WAF
- Profit
Building the Target Application
You will do the following
- Launch a pair of EC2 instances and name them.
- Prep the backend to receive web traffic.
- Create a target group
- Launch an ALB and associate it to the target group
- Test the setup
Launch EC2 Instances
Pro Tip: All AWS objects will be namespaced with the prefix vcto-waf-tutorial- to assist you in cleaning up when you are done.
We will launch two t2.micro instances running Ubuntu 16.04.

2. Choose Ubuntu Server 16.04 LTS (HVM), SSD Volume Type. (ami-41e0b93b)
3. Choose t2.micro for the instance size. Click “Next: Configure Instance Details”
4. Fill in the following, then click “Next: Add Tags”
- Type “2” for the Number of Instances.
- Choose a non-production VPC.
- Set the Shutdown Behavior to “Terminate”
5. Click “Next: Configure Security Group”
6. Select “Create a new security group” and fill in the following:
- Security group name: vcto-waf-tutorial
- Description: vcto-waf-tutorial
- Set rule per the screen shot below:

7. Click the blue “Review and Launch” button at the bottom right of the screen.
8. Review the information and click the blue “Launch” button in the bottom right.
9. Choose a key pair you have access to, or take a moment to create and install one.
10. Click on the blue “View Instances” button.
11. Name your instances
- vcto-waf-tutorial-attacker (attacker)
- vcto-waf-tutorial-backend (backend)

Prepping the Backend
Shell into (ssh) your backend instance and install Apache, then exit the machine. (Yes, that is all we need)
sudo apt-get install --assume-yes apache2
Gotcha: Dont forget that you are expected to be the user ubuntu and not the user on your workstation (e.g. ssh ubuntu@52.207.238.240)
Trust but verify! From your workstation, you can test your apache set up:
curl -I 52.207.238.240
Or you can use your browser.
Gotcha: The IP of your backend server will be different than mine.
Setting up the ALB
First you will need to create a target group.
1. In the EC2 console, click the Tagret Groups link on the left.
2. Click the blue button in the upper right “Create target group”
- Set the Target group name to: vcto-waf-tutorial-target-group
- Accept the other settings and create the group.
3. Select the Row of your new target group and click the Targets tab below.
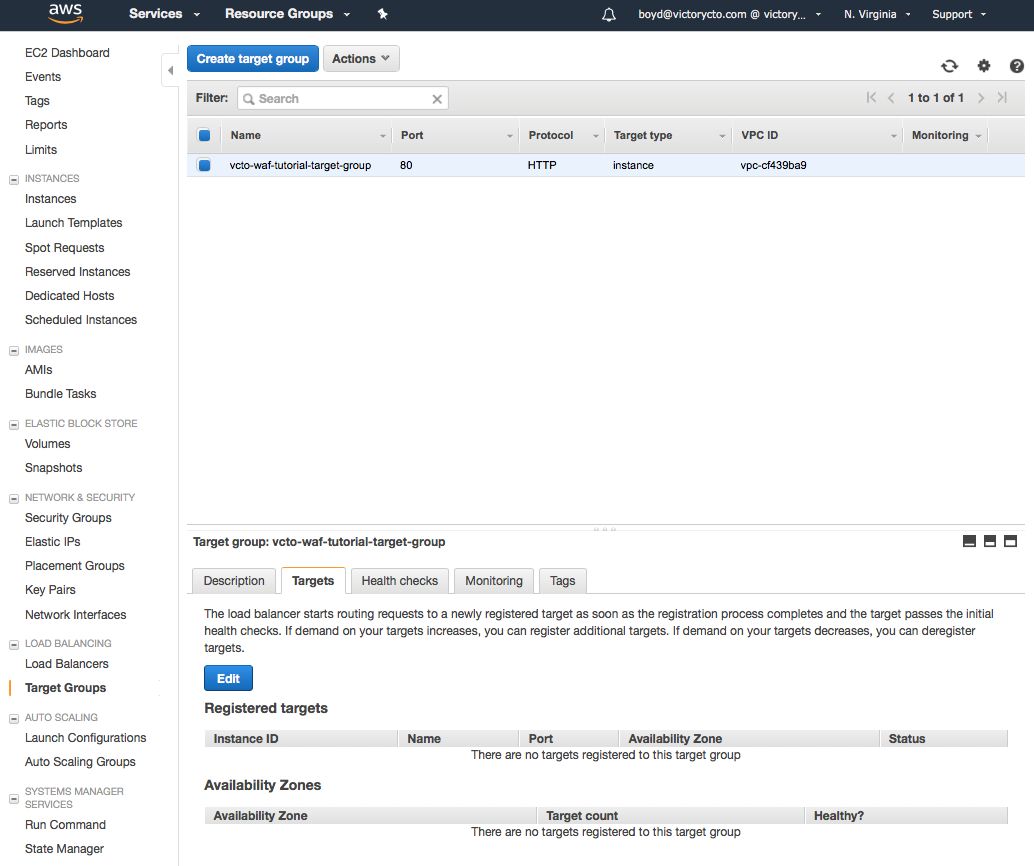
4. In the tab, click the blue “Edit” button.
5. In the list of instances below, select the one named vcto-waf-tutorial-backend (the same one you installed Apache on), and click the blue “Add to registered” button.
6. Click the Save button to make the instance part of a target group.
Now create the ALB:
- Click on the Load Balancers link in the left menu.
- Click the blue button labeled “Create Load Balancer” and click the “Create” button in the “Application Load Balancer” tile on the left.
- Set the Name to: vcto-waf-tutorial-alb
- Since my backend instance is in us-east-1d I will choose it and us-east-1a as my Availability zones.
- Click the grey “Next: Configure Security Settings” button (you will have to do this twice to avoid the https nag message)
- Select the vcto-waf-tutorial-sg security group and click the grey “Next: Configure Routing” button.
- For Target Group, select “Existing target group”
- For Name, select “vcto-waf-tutorial-target-group”
- Click the gey “Next: Register Targets” button.
- You will only have one, so simply click the “Next: Review” button.
- Look over the information and click the blue “Create” button in the lower right.
This is a good time to get coffee | tea | adult beverage, as you will need to wait for the ALB to provision.
Time to trust, but verify the ALB functions as expected.
Click on the ALB then the copy the DNS name from the Description tab below.

You can check the response from the ALB with a curl command
curl -I http://vcto-waf-tutorial-alb-2042528276.us-east-1.elb.amazonaws.com
Or, you can drop the URL in your browser. You will see the Apache/Ubuntu welcome screen.
Optional DNS Entry
We will make a Rout53 entry to make the address easier to remember.
Gotcha: While we will be using a subdomain that is almost assuredly not in use, remember you could be dealing with live records. Careful what you delete when cleaning up!
We are going to create a canonical name (CNAME) record to point to vcto-waf-tutorial.victory.cloud
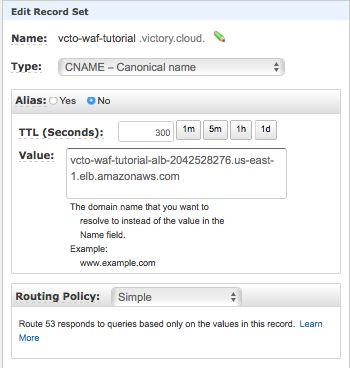
Remember it will take a minute or two for the record to propogate. Route53 has a nice test feature to use.
Once the test is past, confirm with a curl command from your local workstation
curl -I http://vcto-waf-tutorial.victory.cloud
We will use this address going forward, but you will need to translate it to the address you have configured.
Checkpoint – ALB Fronted Web Application
Take a deep breath. We have just provisioned a simple web application that is using an Amazon Application Load Balancer (ALB).
Now it’s time to protect that application from bad actors by putting a Web Application Firewall in front of it.
Basic Concepts of the Amazon WAF
It can be very easy to lose your way the first time through implementing Amazon’s WAF. To mitigate some of that confusion keep the the following associations in mind.
A “Web ACL” is associated with one or more ALBs or Cloudfront Distributions. This article will focus on ALBs. A “Web ACL” has one or more rules to apply to the traffic coming to your ALB.
A “Web ACL” is made up of one or more “rules.” Each rule is a collection of one or more “condtions”. For a rule to apply to a request, all conditions of the rule must be met.
Similarly a “condition” is made up of one or more “filters.” All of a filter conditions must be met for the filter to apply.
Creating a Web ACL
WAF is not a service that you deploy (e.g. EC2, RDS), rather it is a service you consume. As such, there is no WAF instance, there is only configuration.
Click on the WAF & Shield and click the blue “Go to AWS WAF” button on the left.
To get started, click the blue “Configure web ACL” button at the top of the screen.
You are presented with a Concept overview. Take a few minutes to compare it to the Basic Concepts section above, then click the blue “Next” button at the bottom right.
Get the ip of your workstation. Mine is 99.62.168.201 for reference later.
Create the Web ACL by setting the following and clicking the blue “Next” button.
- Set the Web ACL name
- For “AWS resource to associate” select vcto-waf-tutorial-alb
What Happened? – An ACL that will hold one or more conditions to evaluate traffic has been staged for creation. (Staged because we are using the wizard)
In the IP match conditions section, click the grey “Create condition” button.
- Set the Name to vcto-waf-tutorial-block-my-local
- Set the address to your local IP in CIDR notaton. (e.g. 99.62.168.201/32)
- Click the grey button in the middle of the light box “Add IP address or range” and you will see your local IP fill in as a Filter below.
- Click the blue “Create” button.
What Happened? – The Condition was created and you have been circled back to the Create Conditions step of the wizard. YOu should see the name of the condition in the list of IP match condtions.
That is all we want for conditions right now right now.
Scroll to the bottom of the page and click the blue “Next” button. YOu will be presented with the “Create rules” screen.
Choose the grey “Create rule” button to the right.
- Set the name to vcto-waf-tutorial-rule
- In the Add conditions box,
- ensure “does” is selected
- Choose “originate from an IP address in”
- select vcto-waf-tutorial-block-my-local
- Click the blue “Create” button in the bottom right of the lightbox. You will see a green message saying “Rule created successfully.
- Below the message you will see the new rule with the ACL set to “Block”. Change this to count.
Pro Tip: Implementing a WAF can block desirable traffic if done wrong. When getting started, use the “Count” for all of your ACLs first. Move to Block after you are sure the rule as the desired intent.
Choose the Default action: “Allow all requests that don’t match any rules”, then click the blue “Review and create” button. One you are happy that you have what you want, clicke the blue “Confirm and create” button.
Congratulations
At this point, you have implemented the AWS WAF in front of of your web application. But, that is just the start. WAFs require care and feeding.
Generating Traffic
Before we look at the WAF reporting, lets put our application under load.
Remember that we are setting up to block our local machine, but for the mean time we are going to count requests from our local IP as if we might be a bad actor.
A Simple Traffic Script
Consider the following bash script:
#/bin/bash
# waffing.sh
URL=http://vcto-waf-tutorial.victory.cloud
for I in {1..100000}
do
# Would be nice to randomize some stuff on the end
ATTACK=$((1 + RANDOM % 2))
case $ATTACK in
1)
URI=”
TYPE=”None – maybe IP blocked”
;;
2)
URI=’/’
TYPE=”None – use slash after URL – maybe IP blocked”
;;
esac
curl -s $URL$URI > /dev/null
echo “$I – $TYPE”
sleep 1
done
If you are unfamiliar with bash it makes requests to our application via curl. It is set up to allow for many diffent types of attacks to be coded in, but right now it is just hitting http://vcto-waf-tutorial.victorycto.cloud and http://vcto-waf-tutorial.victorycto.cloud/ (note trailing slash).
The Attacker Instance
Remember that you created the second AWS instance vcto-waf-tutorial-attacker.
Shell into that machine and create a file in the home directory of the ubuntu user (where you landed upon loggig in).
touch ~/waffing.sh && chmod +x waffing.sh
Then copy and paste the above code into the file. Be sure to change the URL to either that of your ALB or the DNS entry you created above.
Run the script from the attacker:
~/waffing.sh
The expectation is that we will see this traffic pass with no problem.
The Local Workstation
On your workstation, create the file waffing.sh and give it executable permissions
touch ~/waffing.sh && chmod +x waffing.sh
Then copy and paste the above code into the file. Be sure to change the URL to either that of your ALB or the DNS entry you created above.
Run the script from your workstation
~/waffing.sh
The expectation here is a bit different. In this case, we will see traffic be counted within a given sample.
Traffic to the ALB
I used a green terminal for my attacker instance and a black terminal for my local workstation.
You should see traffic requests ticking by once per second something like this:

It is time to refill the coffee | tea | adult beverage and stretch. WAF sampling takes a few minutes.
Watching WAF Behavior
Don’t start this section until you have waited at least 10 minutes for traffic to flow.
There is no other way to put it. At this point the WAF dashboard is cludgy at best. Watch the gotchas below to save time thinking about what is happening.
In the upper left corner menu, click the “Web ACLs” link. Click on the vcto-waf-tutorial-web-acl link. This is the one you created above.
You will be presented with a graph that looks like the one below.

Gotcha: Everytime you reload the page, the color key will change.
What you can immediately see is that thre are two types of traffic.
All AllowedRequests – This is every request that makes it through the WAF.
ALL CountedRequests – Every request coming from our local workstation.
It is easy to see the counted is about half the total which makes sense.
If you click on the rule “vctowaftutorialrule” (the green one above) you will see it covers up the purple “ALL Counted Requests” perfectly. This also makes sense b/c it is the only rule we have doing any counting.
Data Samples
Below the graph, you can request data samples as shown in the screen shot below.

The selection criteria is for the DefaultAction. That is to allow traffic to pass. So in this case we see only the requests that pass. This would be all of them since we are only counting requests from our local workstation. You can see this explicitly in the Action column with the status “Allow.”
In the select box, choose vcto-waf-tutorial-rule and click the grey button “Get new samples.”

Note this time that the Action is “Count.”
Blocking Our Local Workstation
Let’s actively block our IP local IP address. In the upper portion of the screen (above the graph), click the “Rules” tab.
Hidden in the grey table header, click the grey button labeled “Edit web ACL”. You are now looking at the top level of the WAF implemenation.

You can see the one rule we have created and its control is set to “Count”. Change this to “Block” and click the blue “Update” button. You are returned to the Rules tab.
Click on the Requests tab.
- Note that there are no blocked requests.
- Note the Time (UTC) of the most recent request (at the bottom of the sample) is about 5 to 8 minutes behind the present.
Gotcha: There is a warm up and cool down period for the rules. The screen does not auto-fresh. Remember that each time you refresh the screen the color scheme will change.
Time for another cuppa and a stretch. Come back in about 10 minutes just to be sure.
When you do a full page refresh, you will see there are new graph keys in the legend that have to do with blocked requests. That is a good sign.
You will likely see, in the graph, that both the “ALL AllowedRequests” and “ALL CountedRequests” are dropping at the same rate. This makes sense because only half of the requests (the ones from the attacker) are now getting through to the ALB.
You will likely not notice any blocks on the graph. This is a problem of scale. The graph will not resize if you take out the larger values, nor will it show a line along the x-axis.
Finally, in the Sample requests section below, choose vcto-waf-tutorial-rule and click the “Get new samples” button. Scroll all the way to the bottom of the page and you will see that traffic from your local workstation is being blocked.
If you check the URL (http://vcto-waf-tutorial.victory.cloud in my case) in your browser, it will return a 403.
Curl, from the workstation, does the same thing:
boyd.hemphill:~/Desktop 17:53:27 > curl -I http://vcto-waf-tutorial.victory.cloud
HTTP/1.1 403 Forbidden
Server: awselb/2.0
Date: Wed, 31 Jan 2018 23:53:31 GMT
Content-Type: text/html
Content-Length: 134
Connection: keep-alive
Next Steps
Obviously this is a very simple example intended to get an Amazon WAF set up, grok the basic concepts and look at some of the tooling.
You now have a sandox for trying other conditions, rules and ACLs to understand how all these things fit together.
Try setting up new conditions, then attaching them to rules. Associate the new rules in the Web ACL and play with the script to cause SQL injection attacks, or overly large request bodies. Try some geo matching.
And when you are done, first don’t forget to spin down your infrastructure:
- 2 ec2 instances
- 1 alb
- 1 target group
- 1 condition
- 1 rule
- 1 web acl
